Image & Color Overlay
In addition to text layers tied to text inputs, the Personalizer supports static and customer-driven image or color overlays. These allow you to show a color tint, a brand watermark, or a customer-uploaded image on top of the product photo.
Color overlay
A solid color or semi-transparent fill applied over a defined region of the product image.
Common use cases:
- Show how a paint color looks on a room scene photo
- Preview a fabric color on a product silhouette
- Apply a tinted overlay to indicate a selected color without separate product photos per color
Setup:
- Open a Color Swatch element → Personalizer tab
- Enable Color overlay
- Set the overlay region (X, Y, width, height as percentages)
- Set Opacity — 100% is fully opaque, lower values make the overlay semi-transparent so the product texture shows through
- Each swatch value’s hex color automatically becomes the overlay color when selected
Image overlay
Places a fixed image (e.g., a frame, badge, or logo) or the customer’s uploaded image on top of the product photo.
Static image (merchant-defined)
You upload a PNG with a transparent background. This image is always shown in the Personalizer canvas, regardless of what the customer types. Use it for:
- A product frame or border that’s always present
- A watermark or logo that appears on all personalizations
- A decorative element (e.g., a wreath around the text area)
PNG files support transparent backgrounds, unlike JPEG files which always have a solid background. If your overlay shows an unwanted white box around it when you test, the image is probably a JPEG — you’ll need to convert it to PNG first.
Setup:
- In the Option Set → Personalizer settings (option set level, not element level)
- Upload the overlay image
- Position it (X, Y, width, height as percentages)
Customer-uploaded image (via File Upload)
Link a File Upload element to a Personalizer layer so the customer’s uploaded image appears on the canvas.
Setup:
- Add a File Upload element to the Option Set
- Open the File Upload → Personalizer tab
- Enable Show upload in preview
- Set the display region (X, Y, width, height, and optional border radius for rounded frames)
Customer experience: As soon as the customer uploads a photo, it appears in the defined region on the product image. They can drag, resize, and rotate it if those interactions are enabled.
Image Swatch overlay
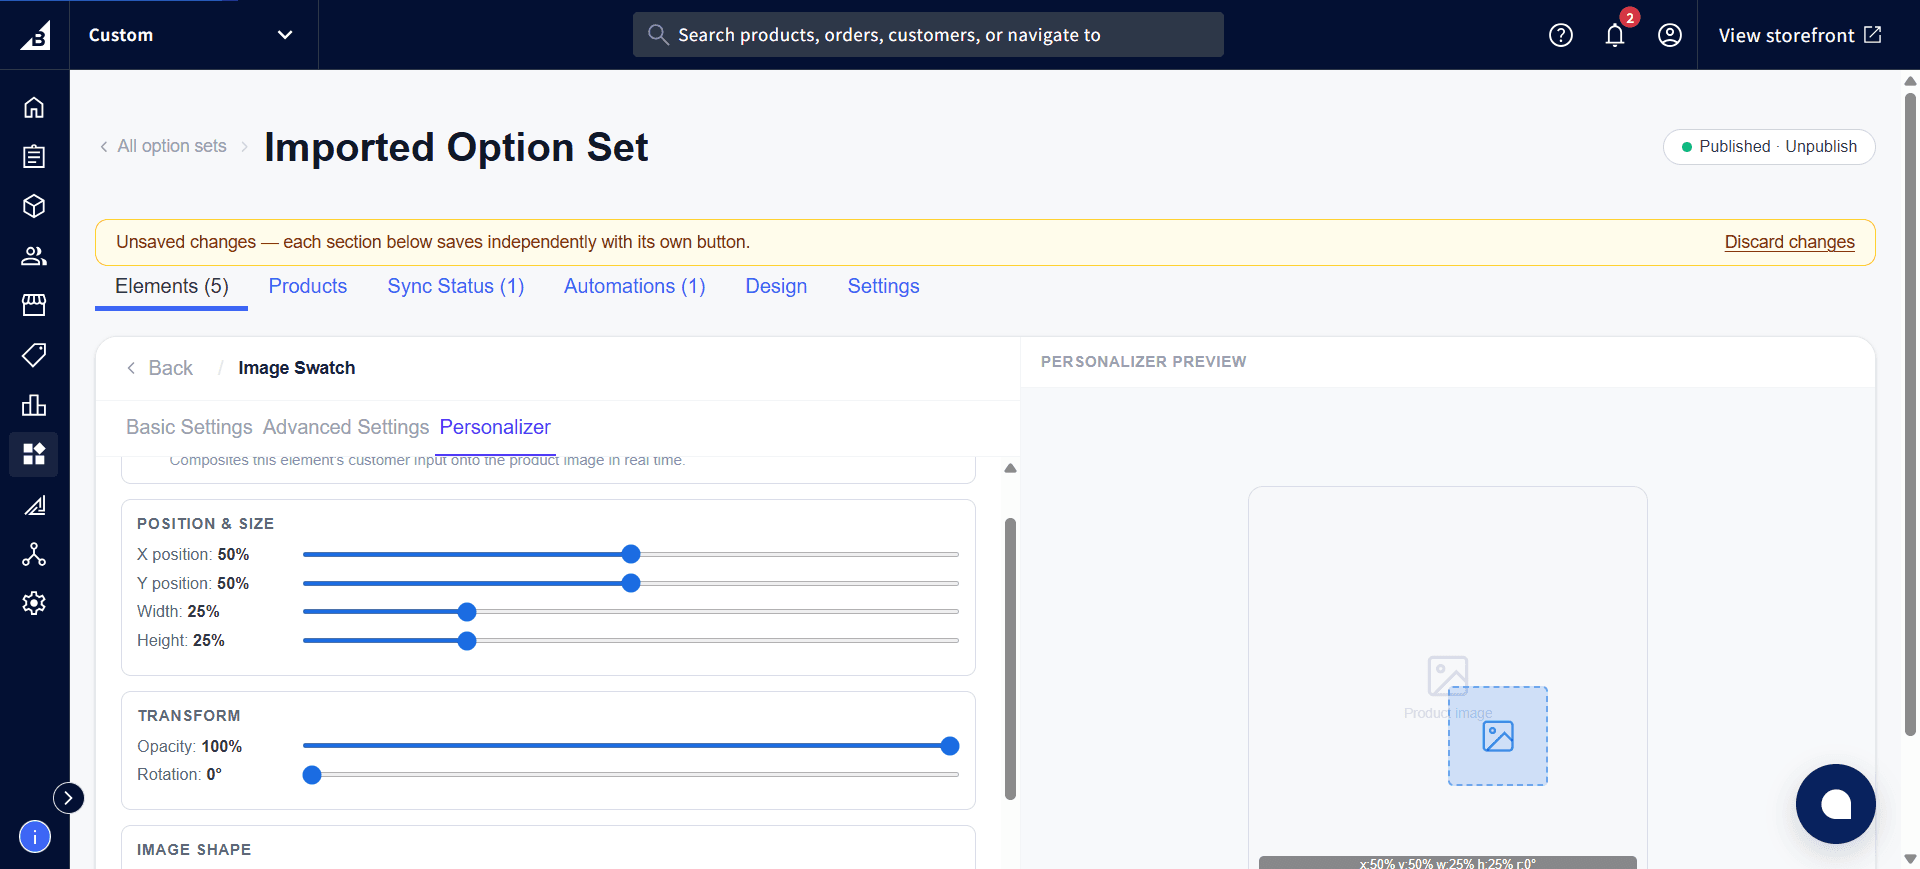
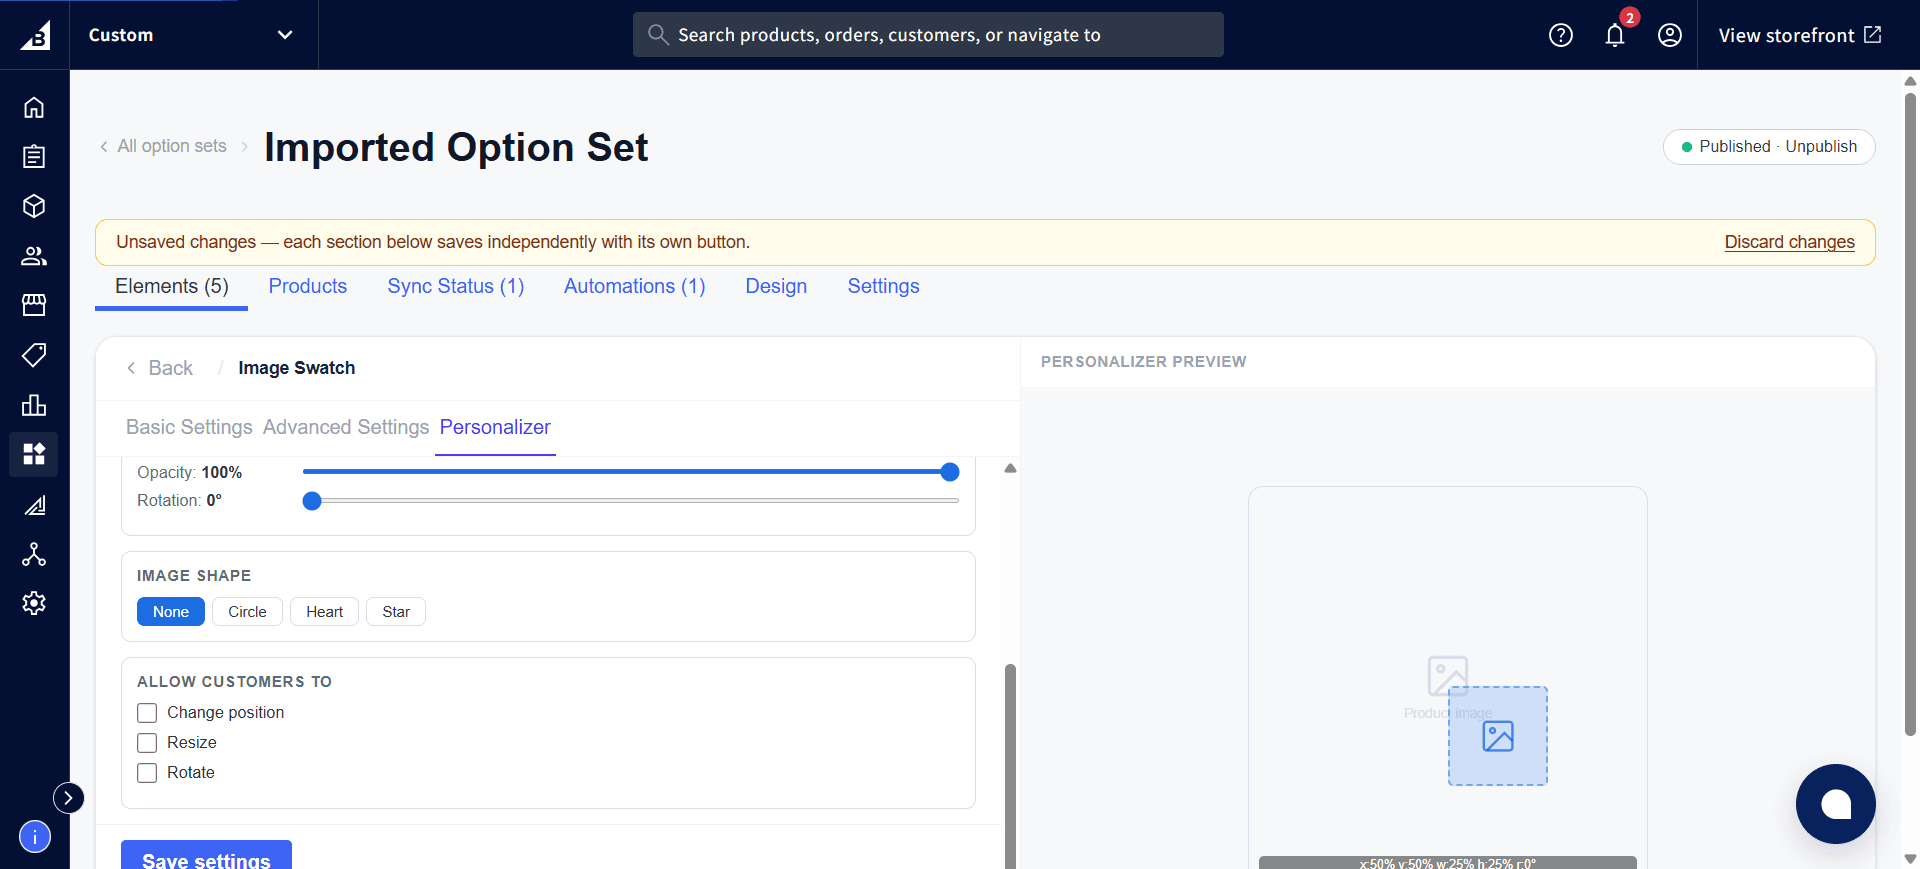
An Image Swatch element’s Personalizer tab uses the same Position & Size and Transform controls as a text layer — with one addition, Image Shape, which crops the overlaid image into None (uncropped), Circle, Heart, or Star:
Layer stacking order
Layers are rendered in this order (bottom to top):
- Product image (background)
- Color overlay (if enabled)
- Static merchant image overlay
- Customer-uploaded image
- Text layers (front)
This means customer-typed text will always appear in front of any color tint or image overlay. If you need text to appear behind an image, that layout is not currently supported.