Option Sets
An Option Set is the top-level container that holds all the elements (fields) for a group of product options. You create one Option Set per logical grouping, then apply it to one or more products.
Creating an Option Set
-
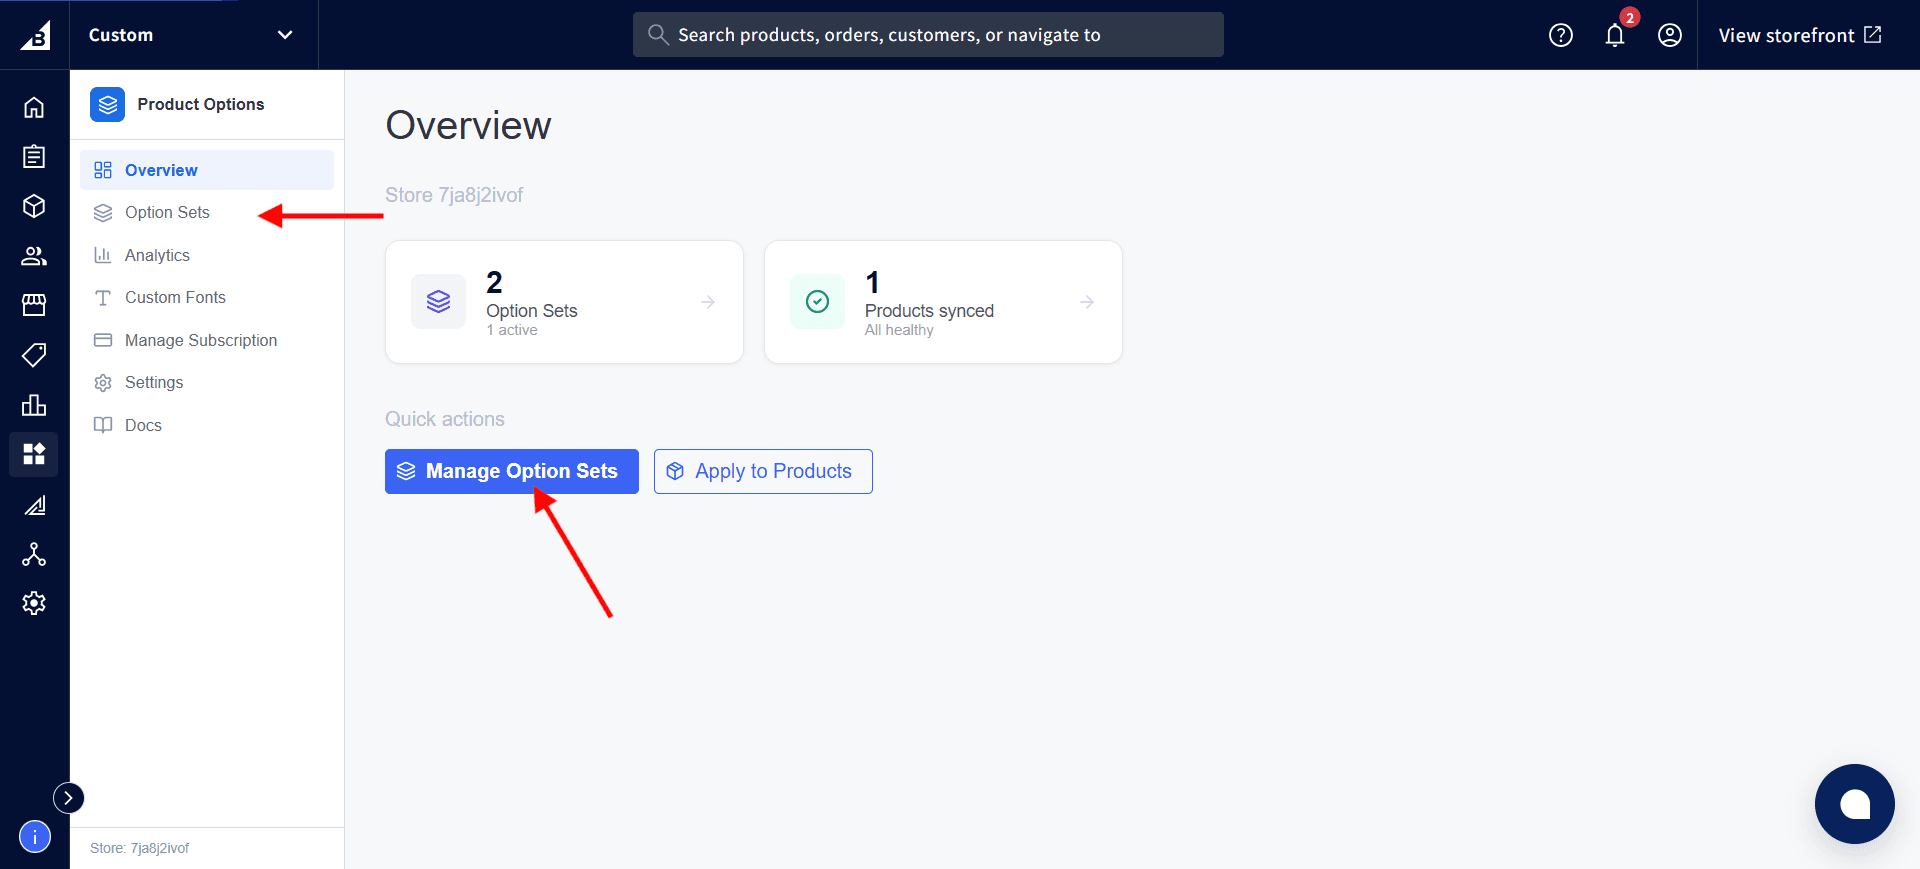
Go to Dashboard → Option Sets using the link in the left sidebar.
-
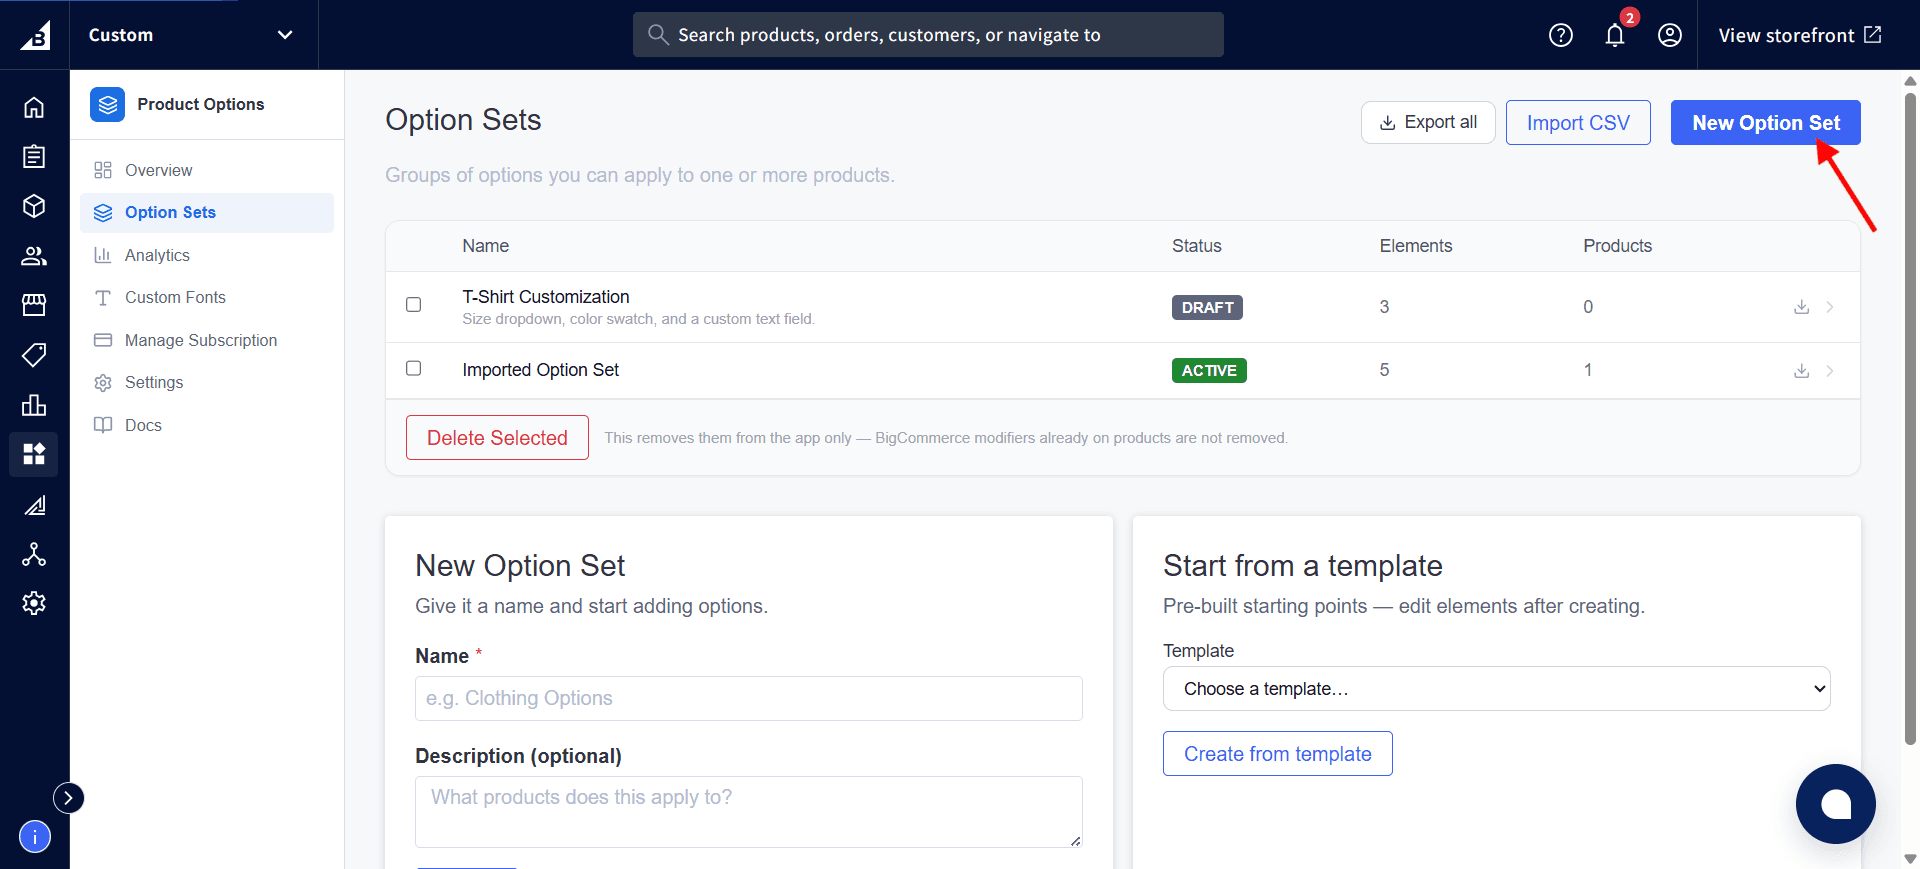
Click the New Option Set button in the top-right corner.
-
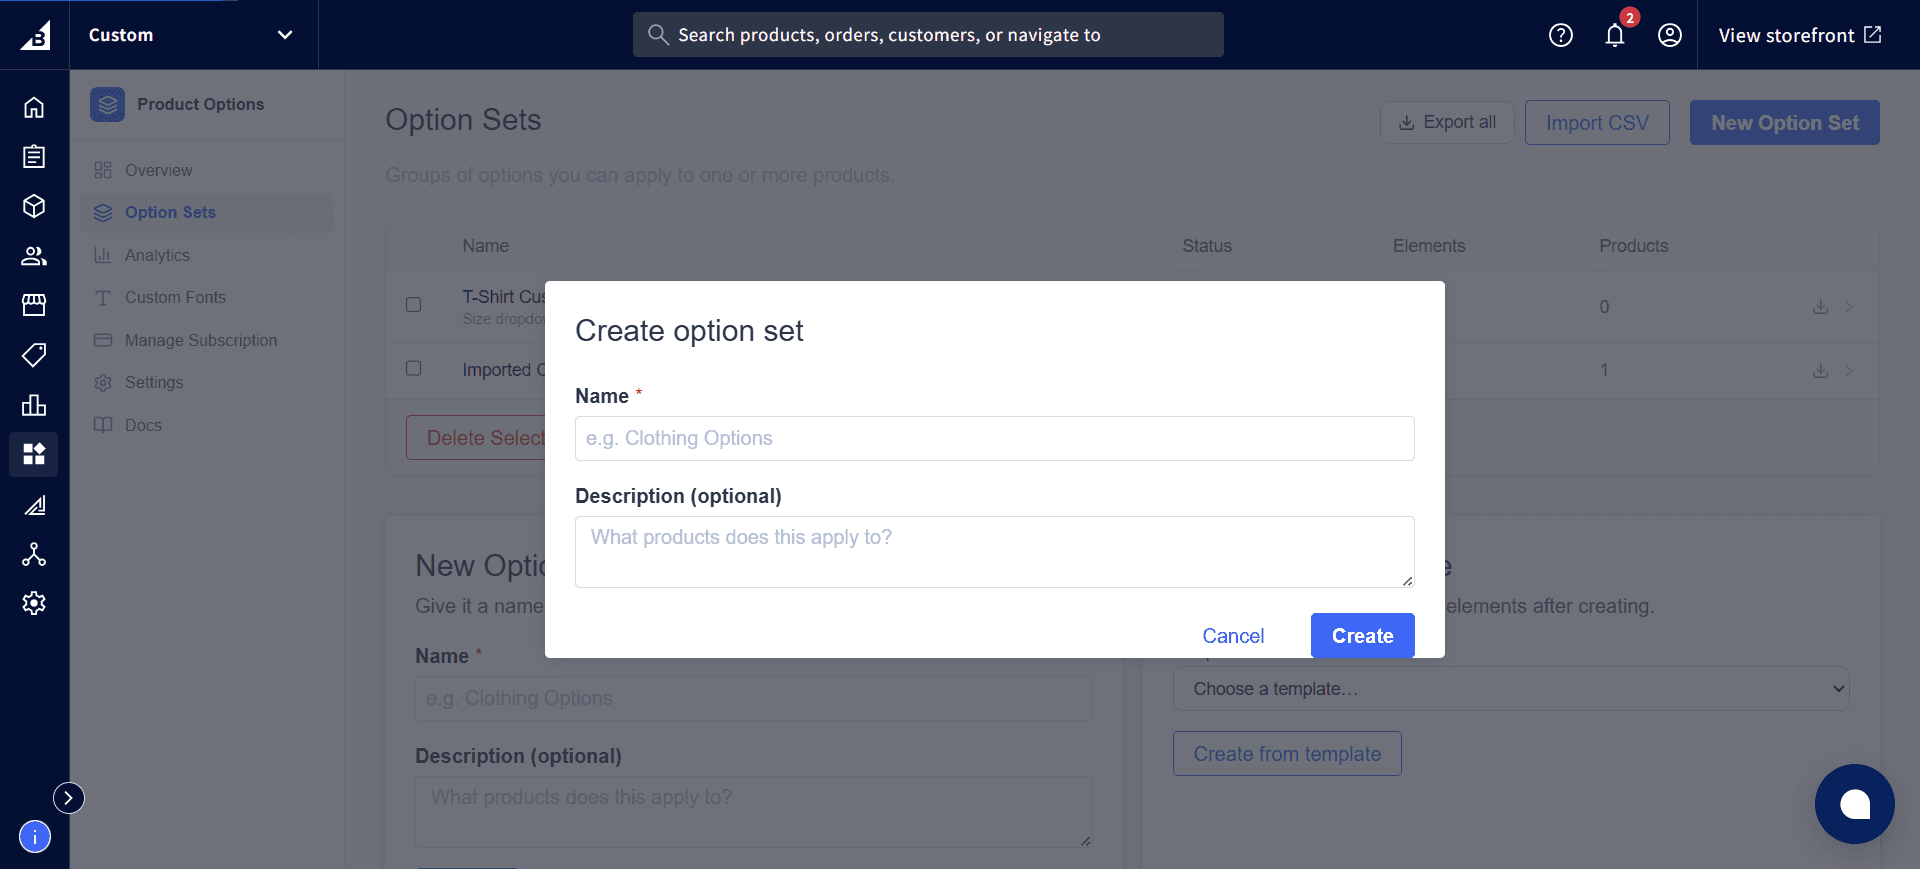
In the Create option set window that pops up, enter a name — this is internal only; customers don’t see it. The Description field is optional and is just a note to yourself about what the option set is for.
-
Click Create.
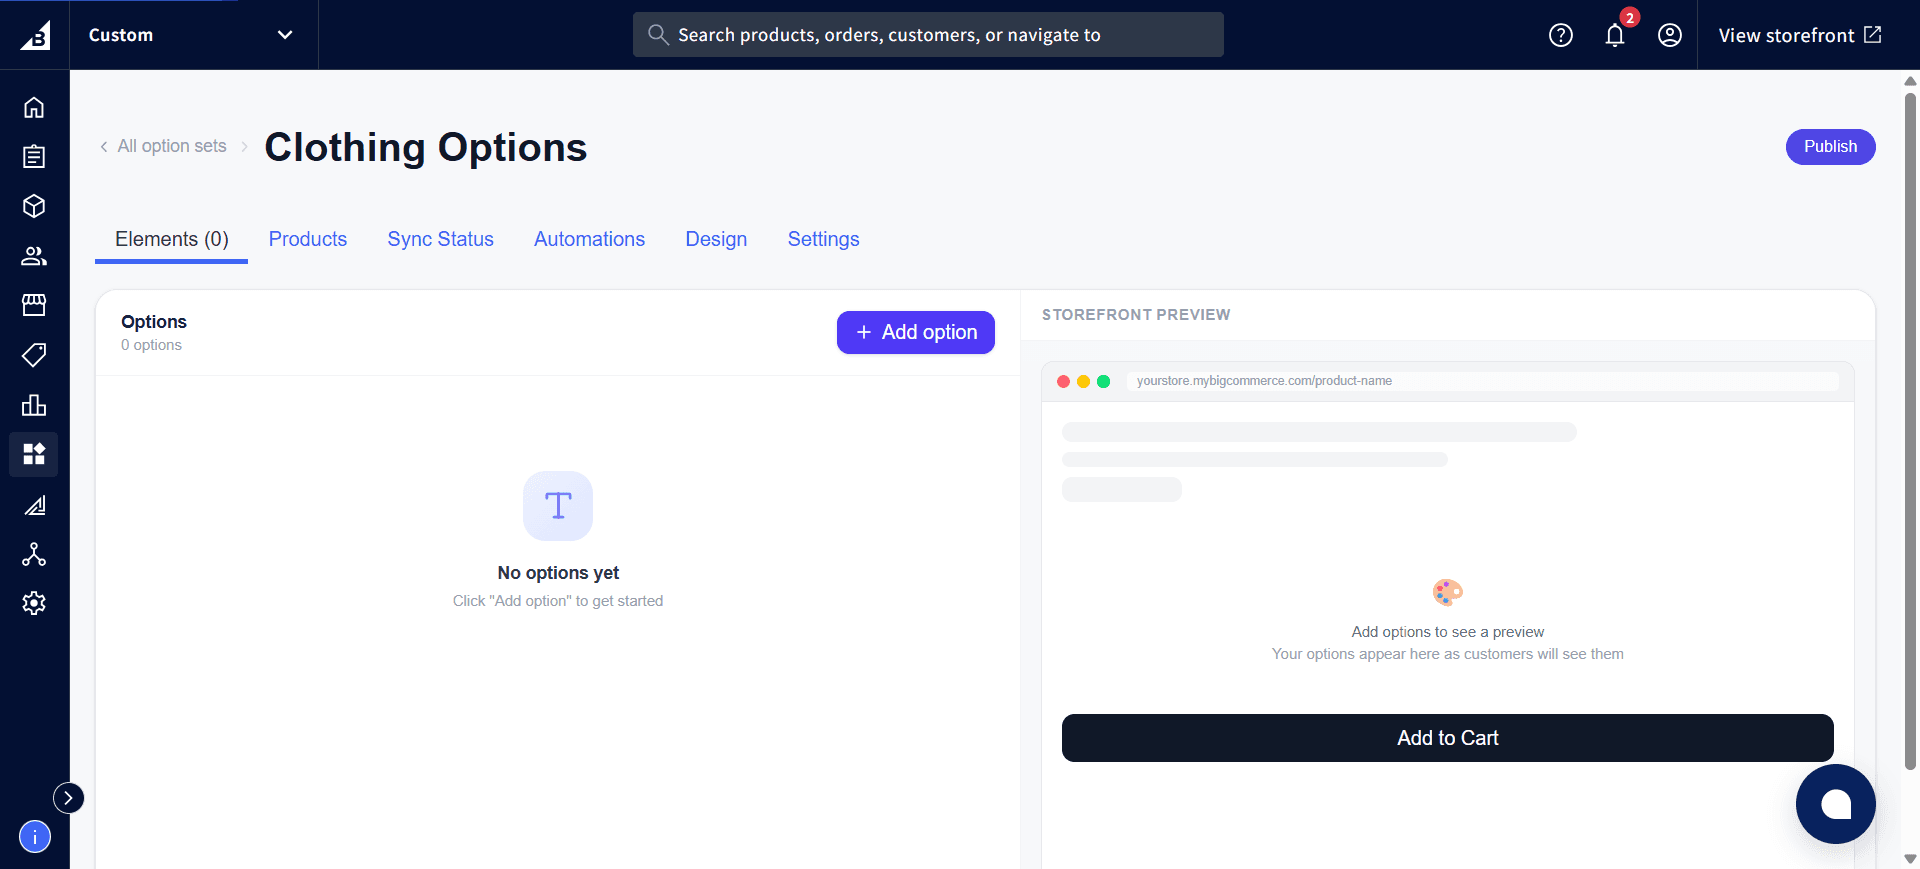
You land on the Option Set editor, which has two panels:
- Left panel — the element list and editor
- Right panel — a live Storefront Preview showing how the option set will look on the product page
A brand-new Option Set starts empty, with a prompt to add your first option:
You can also create an Option Set from a template or by importing a CSV — both options are available on the Option Sets list page.
Adding elements
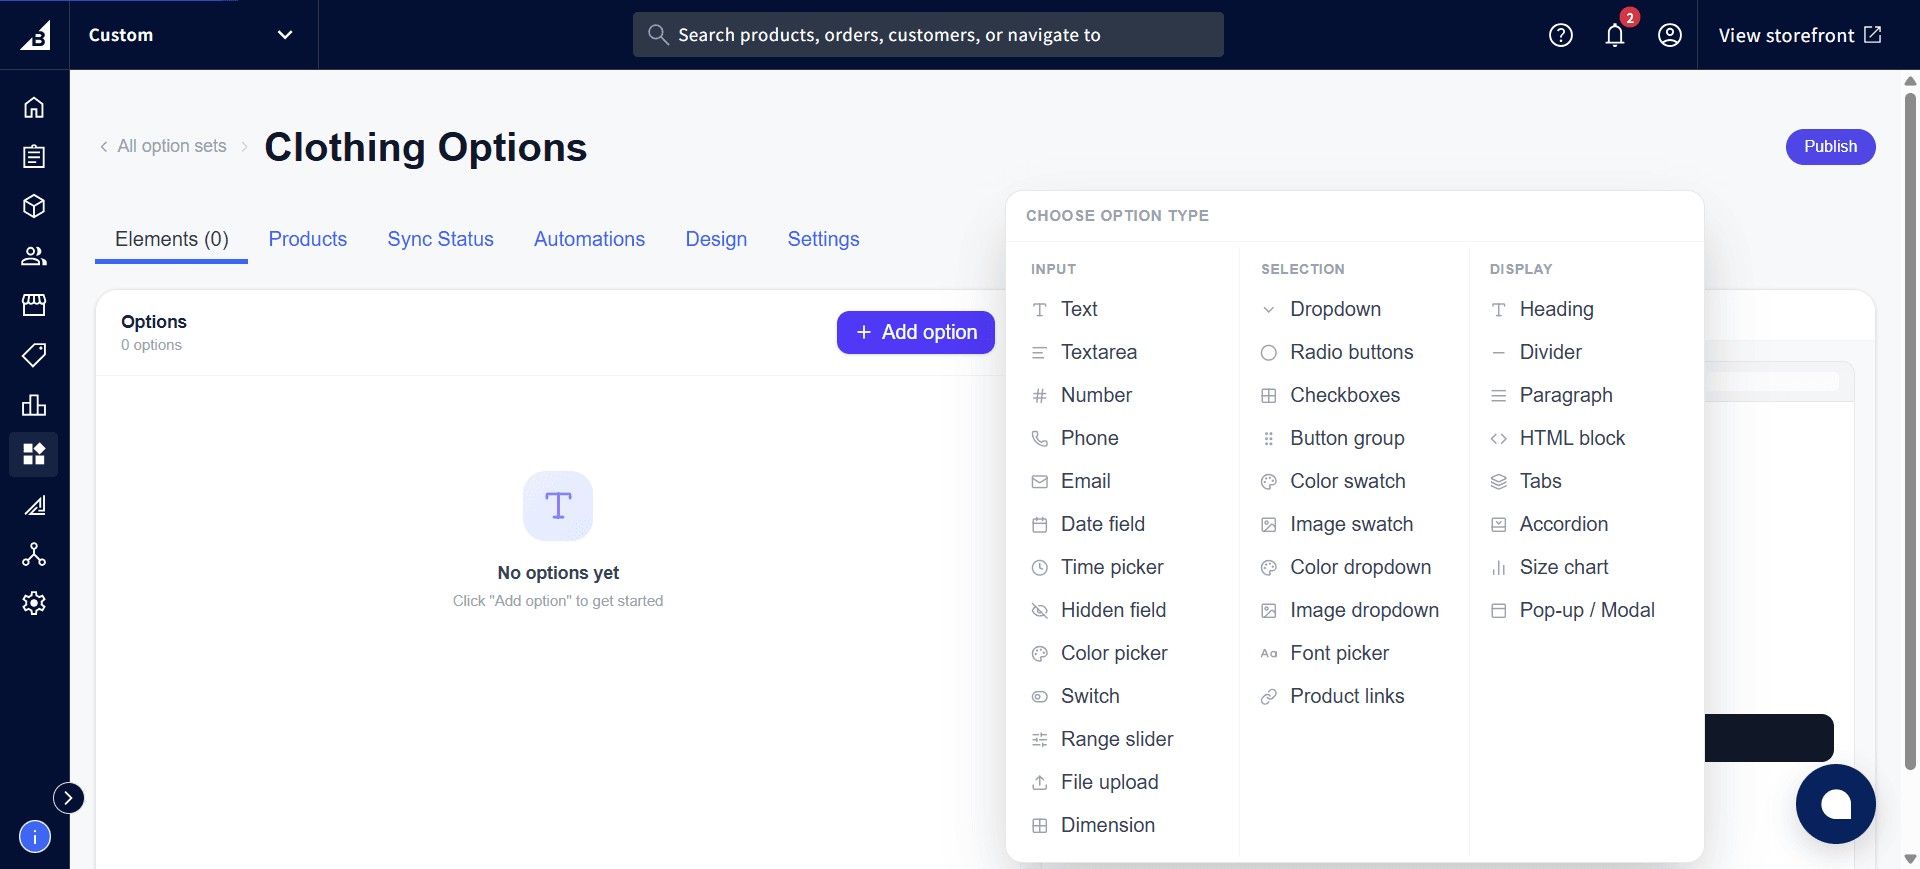
Inside the Option Set editor, click Add option to open the Choose option type picker. Elements are grouped into three columns:
| Category | Elements |
|---|---|
| Input | Text, Textarea, Number, Phone, Email, Date field, Time picker, Hidden field, Color picker, Switch, Range slider, File upload, Dimension |
| Selection | Dropdown, Radio buttons, Checkboxes, Button group, Color swatch, Image swatch, Color dropdown, Image dropdown, Font picker, Product links |
| Display | Heading, Divider, Paragraph, HTML block, Tabs, Accordion, Size chart, Pop-up / Modal |
Click any type in the picker to add it to the option set. After adding an element, click it in the list to open its settings panel on the right. Configure the element’s label, values, pricing, conditions, and other type-specific settings, then click Save changes.
Reordering elements
Drag elements in the left panel to reorder them. The order here matches the display order on the storefront.
Deleting an element
Click the element in the list, then click the Delete button at the bottom of the settings panel. Deleting an element also removes it from BigCommerce the next time the option set is saved — it will no longer appear on orders or on the product page.
Publishing an Option Set
By default a newly created Option Set is in Draft status — it exists in the app but is not visible to customers on the storefront.
To make it live, click the Publish button in the top-right corner of the Option Set header. The button immediately activates the Option Set without navigating away or saving any other settings.
| Button state | Meaning | Action |
|---|---|---|
| Publish (indigo) | Option Set is a Draft | Click to make it Active |
| ● Published · Unpublish (white with green dot) | Option Set is Active | Click to revert to Draft |
Drafting an active Option Set hides it from the storefront on the next page load — it does not remove the setup from BigCommerce on the product.
Option Set sync status
Click the Sync Status tab to see, for every product the Option Set is applied to, its status, when it last synced, and any error message:
| Status | Meaning |
|---|---|
| Synced | Setup complete — your options are live on the product page. |
| Failed | An error occurred — check the error message and click Re-sync to retry |
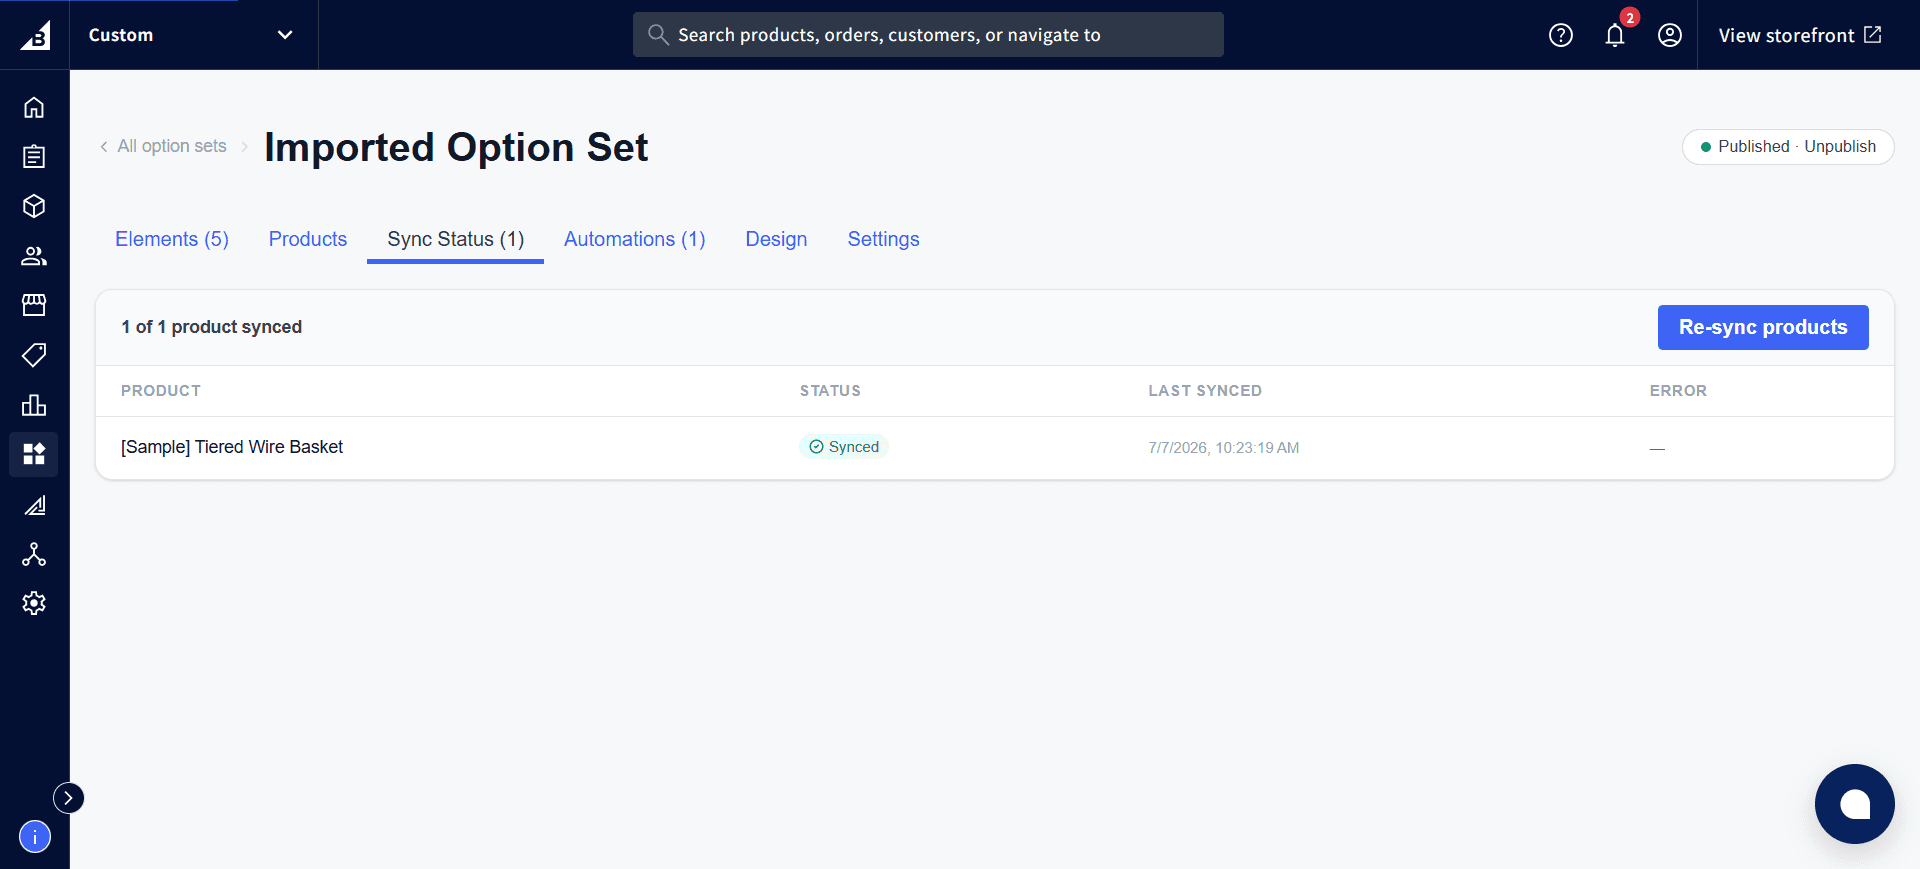
Use the Re-sync products button in the top-right to re-check every product’s sync status at once. Changes apply instantly — as soon as you save an element, the storefront updates. There is no waiting period.
Importing and exporting
See Import & Export for the full CSV format reference and step-by-step instructions.