Automations
Automations let the app react automatically whenever a customer places an order that includes one of your Option Sets — sending your team an email, or adding a note to the order — without you having to do anything by hand.
Available on the Professional and Business plans.
What an automation can do
Each automation does one of two things when it fires:
| Action | What it does |
|---|---|
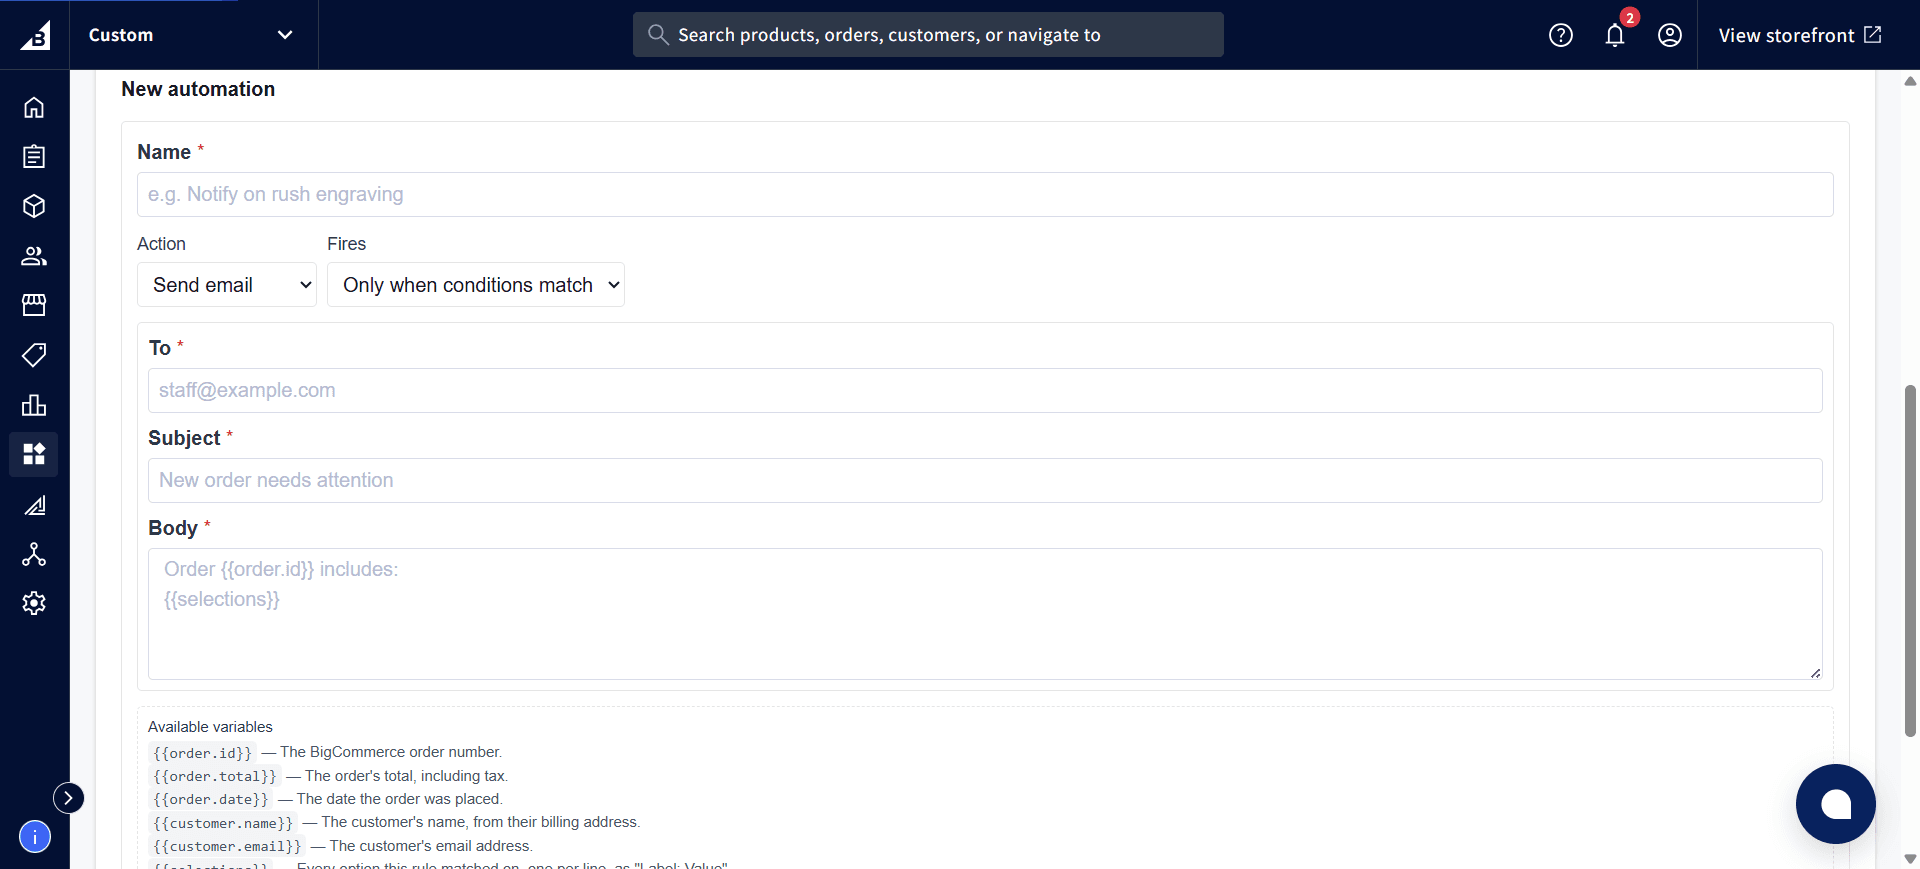
| Send an email | Emails an address you choose — useful for alerting your team when an order needs special attention (a rush order, a custom engraving, a large quantity). |
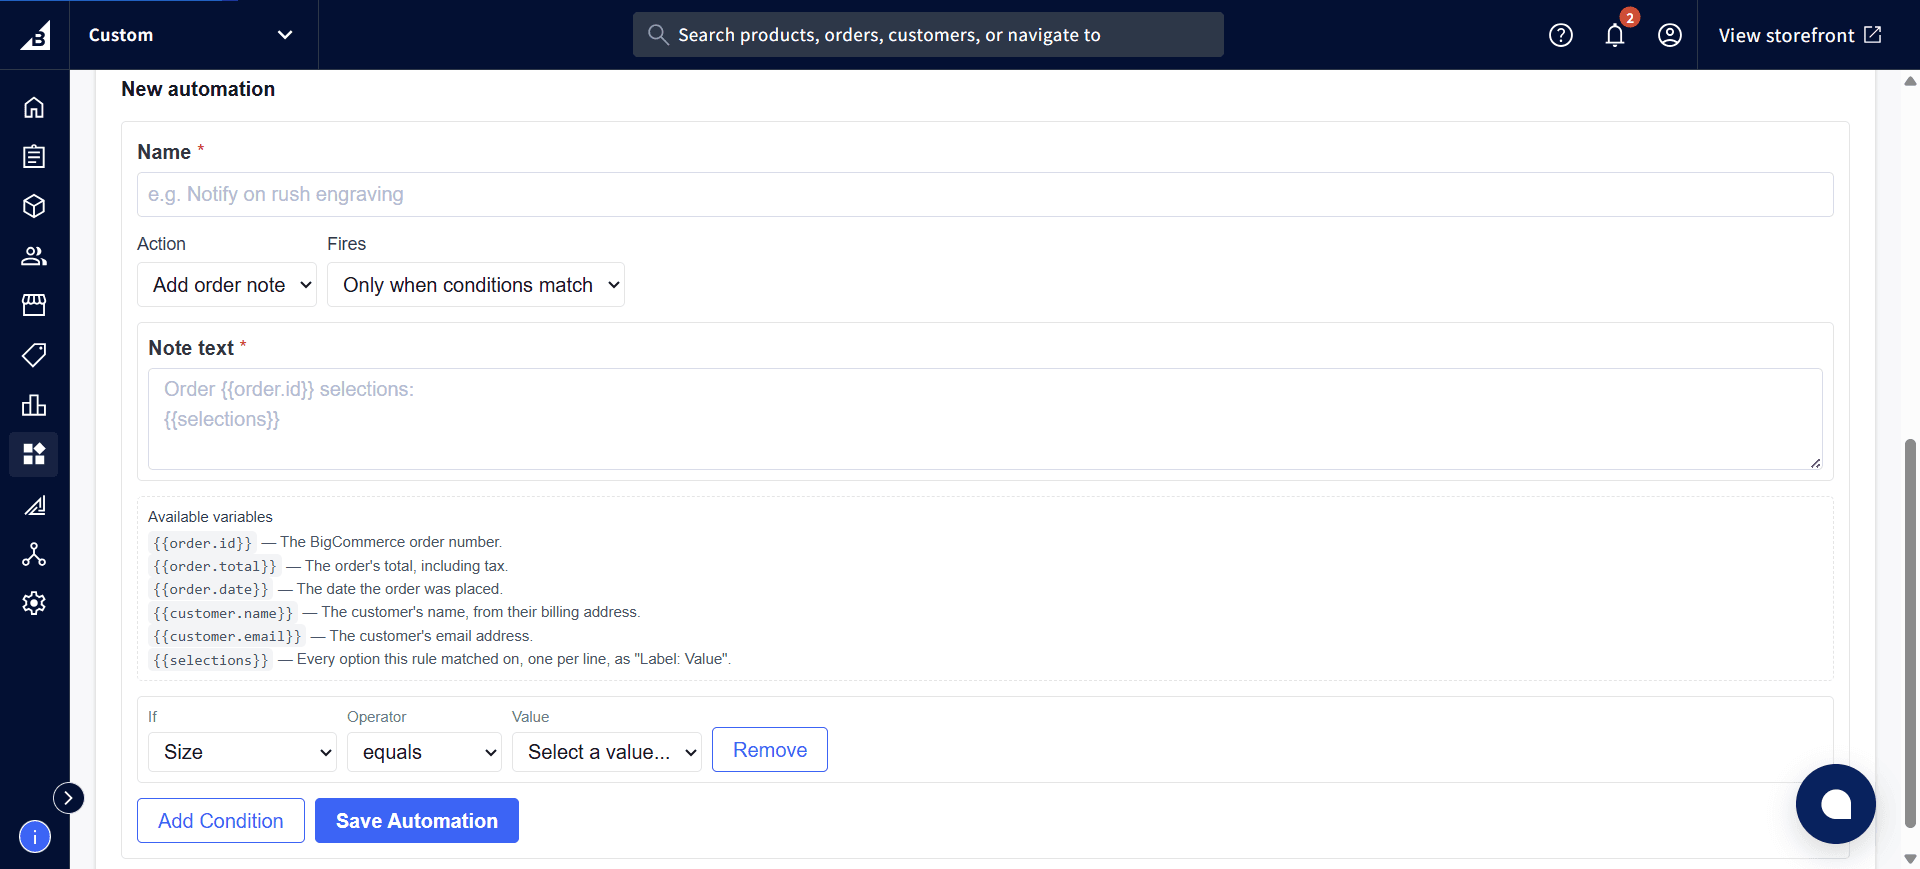
| Add an order note | Adds an internal note to the order in your BigCommerce admin. This note is only visible to you and your staff — customers never see it. |
Creating an automation
-
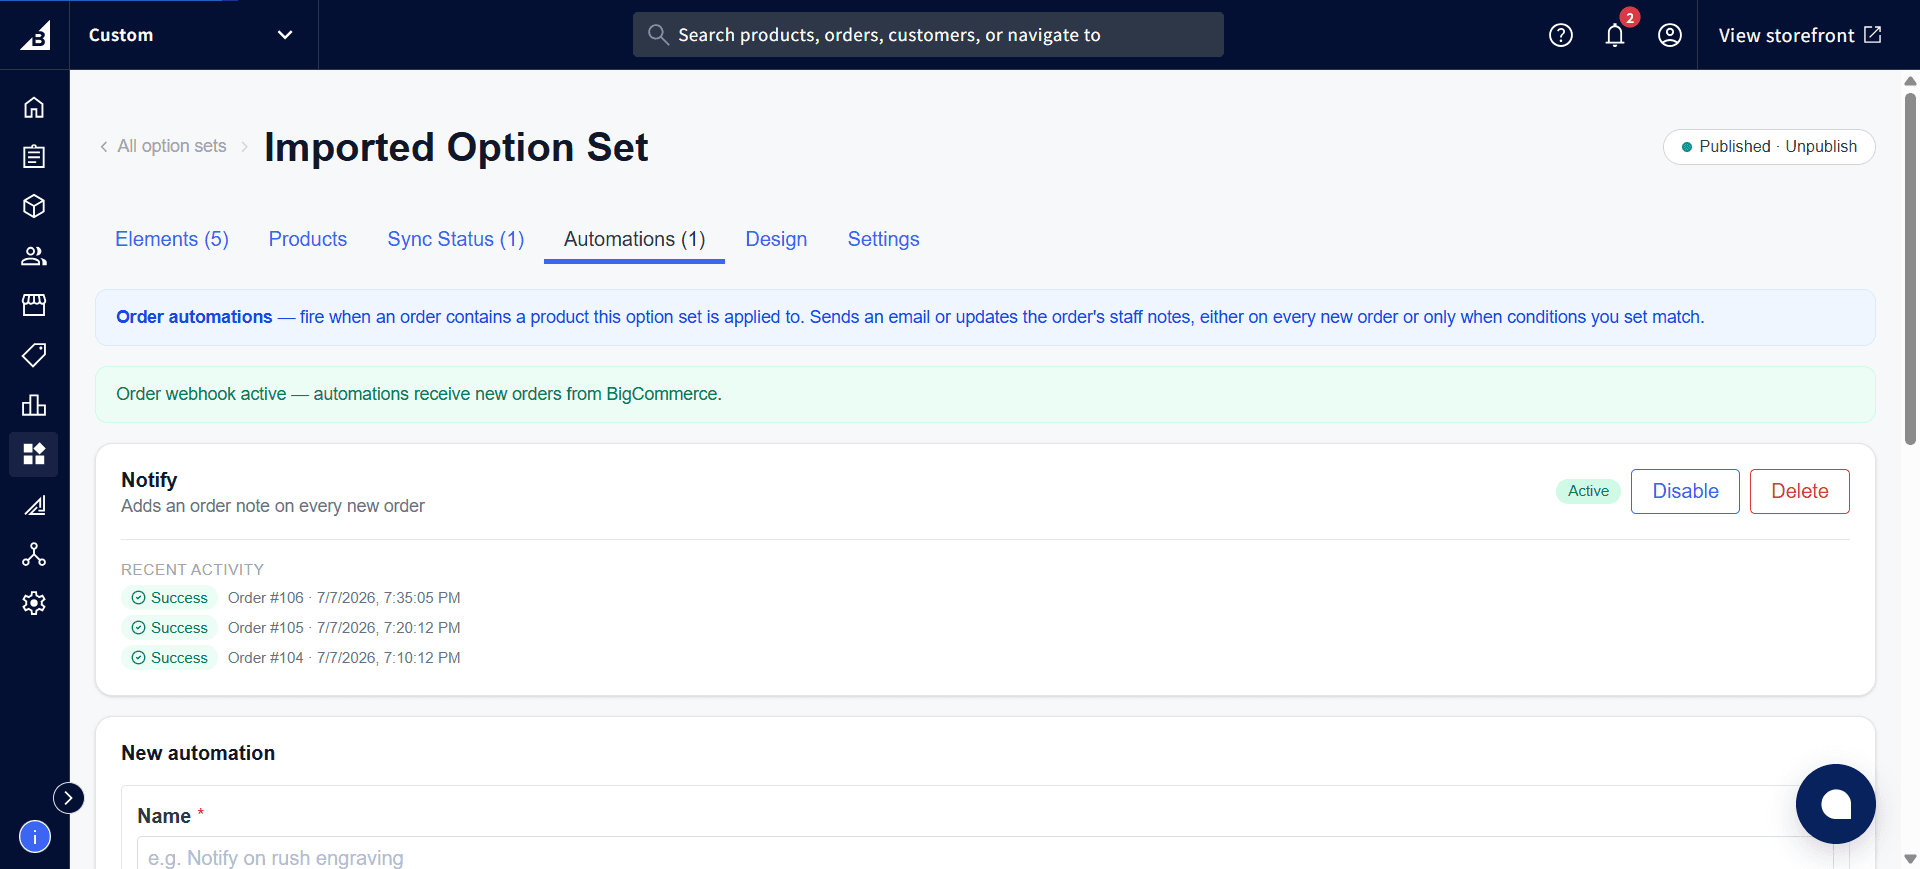
Open an Option Set and go to its Automations tab. Any existing automations are listed here, each with an Active/Disable/Delete control and its own activity log:
-
Scroll down to the New automation section and fill in a Name so you can recognize the rule later (e.g., “Notify on rush engraving”)
-
Choose the Action — Send email or Add order note
-
Choose when it Fires (see below)
-
Fill in the email/note content
-
Click Save Automation
For a Send email automation, fill in To, Subject, and Body:
For an Add order note automation, fill in Note text instead:
When it fires
Every automation fires under one of two modes, chosen from the Fires dropdown:
| Mode | Behavior |
|---|---|
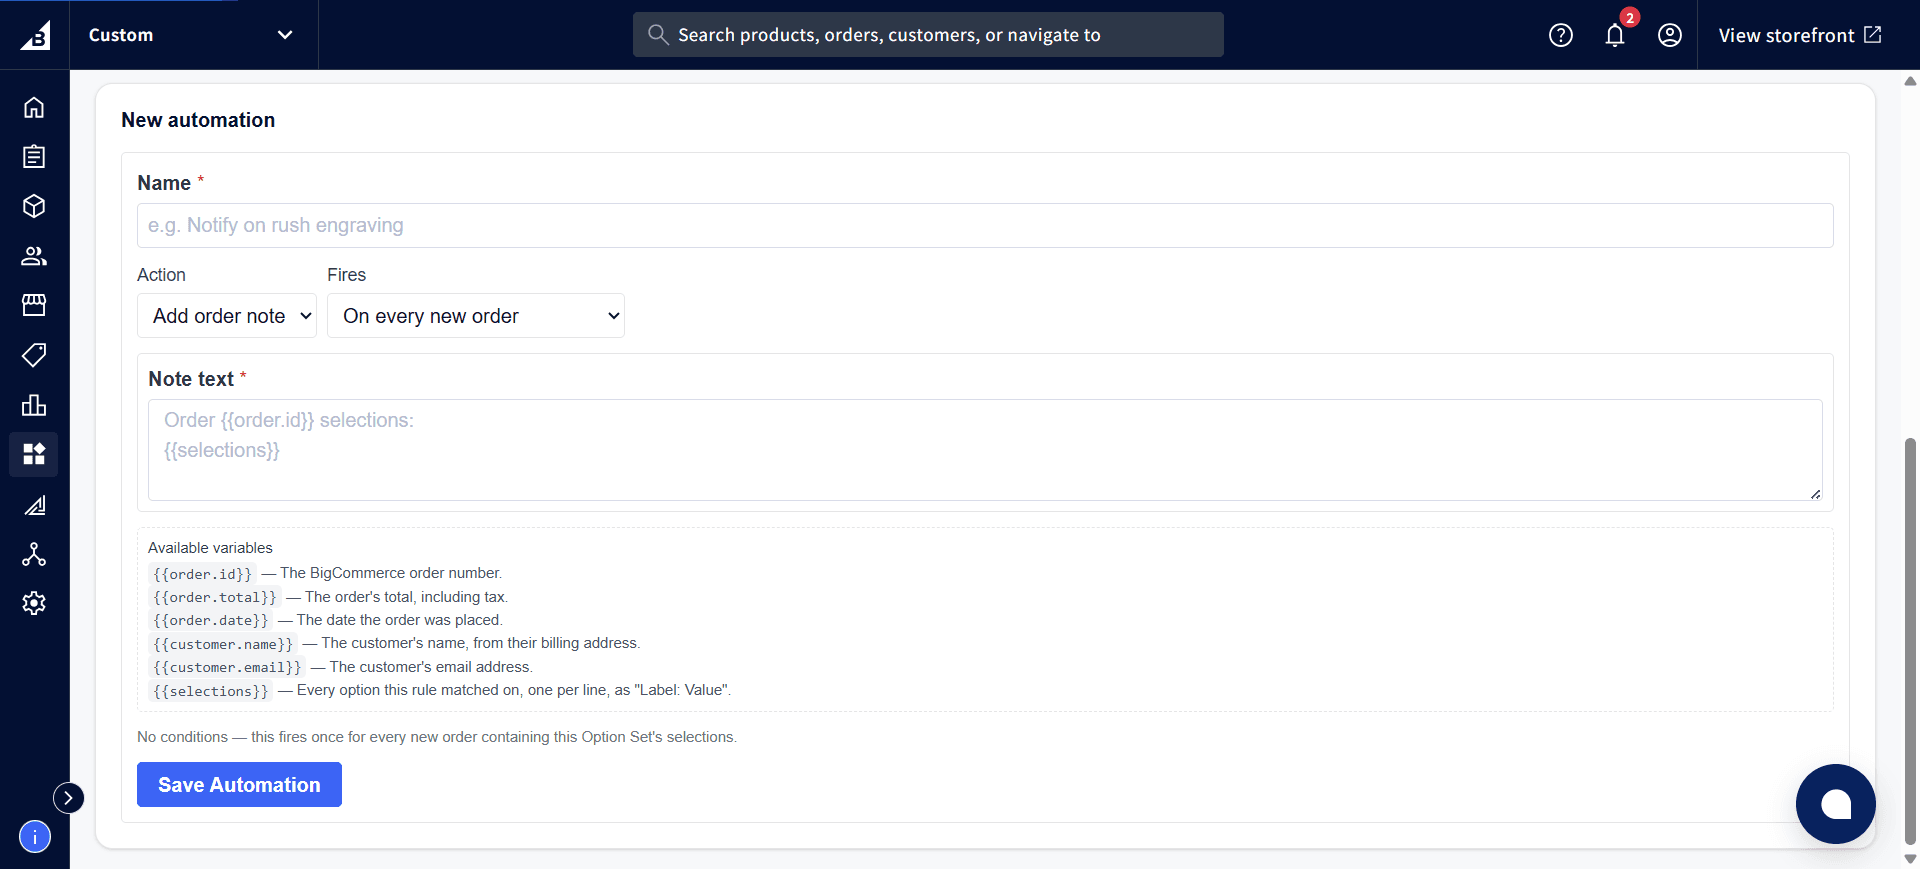
| On every new order | Runs every single time a customer places an order containing this Option Set — no conditions needed. |
| Only when conditions match | Runs only when specific answers were selected, using the same condition builder as Conditional Logic. For example: only send an email when “Size” was set to “XL”. |
If you choose Only when conditions match, click Add Condition to build one or more rules, the same way you would for a show/hide rule elsewhere in the app (shown in the Add order note screenshot above).
Choosing On every new order instead hides the condition builder entirely — the form shows a note confirming it will fire for every order containing this Option Set’s selections:
Using order details in your message
Your email or note text isn’t limited to plain, fixed wording — you can drop in live details from the actual order by typing any of the following anywhere in your text:
| Type this | It gets replaced with |
|---|---|
{{order.id}} | The order number |
{{order.total}} | The order’s total amount |
{{order.date}} | The date the order was placed |
{{customer.name}} | The customer’s name |
{{customer.email}} | The customer’s email address |
{{selections}} | Every option this automation matched on, listed one per line (e.g. “Size: XL”, “Colour: Burgundy”) |
Example note text:
Order {{order.id}} needs a rush engraving:
{{selections}}
This would produce something like:
Order 1042 needs a rush engraving:
Size: XL
Engraving Text: Happy Birthday
A list of these is also shown directly under the email/note fields in the app, so you don’t need to memorize them.
Activity log
Every time an automation fires, it’s recorded underneath that automation’s card, showing the order number, the date, and whether it succeeded. If something went wrong (for example, an email address was invalid), the reason is shown there too.
An automation only ever fires once per order — if something causes the same order to be checked again, it won’t send a duplicate email or add a duplicate note.
Connecting to your orders
The first time you save an automation, the app automatically connects itself to your store’s orders so it can be notified whenever a new one comes in. A status message at the top of the Automations tab shows whether this connection is active:
| Status | Meaning |
|---|---|
| Order webhook active | Everything is connected — automations will fire on new orders. |
| Order webhook not yet registered | Not connected yet. This should resolve itself automatically the next time you save an automation, or you can click Enable order webhook to connect it immediately. |
What’s not supported
BigCommerce doesn’t have a built-in concept of order “tags” the way some other platforms do, so automations here can only send an email or add an order note — there’s no tagging action, since there would be nowhere on the order for a tag to actually show up.
Enabling automations
Automations are available on the Professional and Business plans. See Billing & Subscription to check or change your plan.